| manual_la_english Template for contract partners |
   |
| manual_la_english Template for contract partners |
|
One of the
first steps is to create your contracting partners, e.g. by importing them from
a .csv file. In order to do this, you need to specify which information about
your contracting partners you wish to select and use during the accounting
process (e.g. first name, last name, date of birth, etc.)
Define additional fields
In case you
wish to add additional fields, all you need to do is define a unique ID in the
row “ID” and then key in the applicable definition in the corresponding row
“Field Name”.
Note: IDs
need to be unique, whereas one and the same definition can be used several
times in the row “field name”.
Finally,
the third row “Field Type” enables you to specify the format of the entry (e.g.
date, email address, single or multi-line text, phone number, etc.). Of course
you can change or delete any of these fields at any time - even after you have
saved contracting partners.
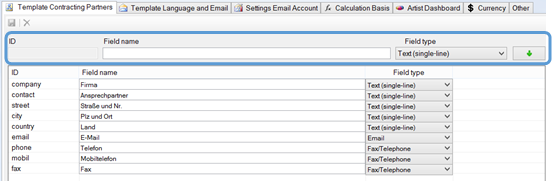
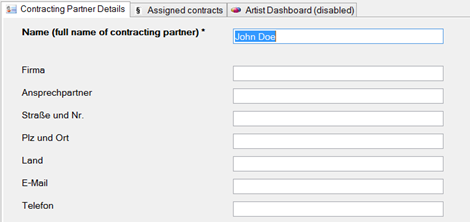
It is
recommended to use a meaningful entry in the row “field name” as this will be
of importance for the succeeding setup of contracting partners (see the following
image):
Rearrange Field order:
The order
of the specified fields can easily be rearranged via Drag&Drop of the ID
field. Simply click on the required ID field, hold down the mouse button, move
the field to the desired position and then release the mouse button.
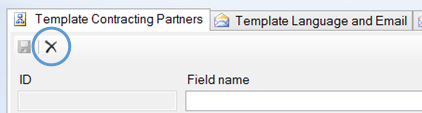
Delete fields:
To delete a
field from the list, select the corresponding line and then hit the
“Delete”-symbol (see the following
image):
Save settings:
Once you
have finished the setup of your template click on the floppy disk symbol to
save your settings (see the following image):

Related Topics
| |